Editor’s comment, June 2020: This post seems to be, by far, the most popular page on this website, and still averages a few dozen visits each week. The solutions proposed on this page have neither been reviewed nor updated since 2013. We take no responsibility for any problems that may arise.
 I got a new computer the other day. Well, that’s a partial truth — it’s a machine that’s new to me. (The machine was shipped to its original customer in February 2010.) It’s a Dell Latitude XT2, a notebook computer that converts into a tablet PC with a resistive touchscreen. It came with a neat little stylus that works quite well for being a pressure-activated screen!
I bought the machine from Dell Financial Services’ Direct Sales unit for cheap. With shipping and a one-year warranty, I only spent about $500. By comparison, when the machine was shipped new in 2010, the street retail price started just under $2,000! It was a good purchase for me because as I’m starting to run more and more errands for my consulting, sometimes schlepping around an iPad alone just doesn’t cut it. There are times when it’s important to have a full computer. As I do a lot of commuting by bicycle and public transportation, I also don’t want my MacBook Pro to suffer the wear and tear of my commute…or worse, get damaged or destroyed if I were to get in an accident. The XT2 was a small purchase that, although I’d be sad to destroy or damage this machine, I can afford to purchase a replacement should I need to.
Enough philosophy: let’s get to running Ubuntu on this machine. The machine came shipped with Windows Vista but that was the first thing to go. I replaced it with Ubuntu 12.04.2, codenamed Precise Pangolin within minutes of turning it on for the first time just to make sure that it worked well. I read through several online guides about how to make this machine work and although the steps seemed daunting, I found that they were largely unnecessary and not needed. In simple terms, my steps were this:
- Ensure that the system OS is up to date with the latest standard Ubuntu kernel
- Update the system’s BIOS to the latest version (at this writing, it’s version A12)
- Check the system BIOS to see what wireless cards are enabled or disabled
- Install the Magick Rotation utility
- Have a lot of fun!
If you’re interested in my steps that I took in greater detail, I’ll go through them. Do note that most all of this is done from the terminal so your typing accuracy has to be spot on. Your results, although they should be like mine, may vary: please make a backup of your data before embarking on this journey (and don’t blame me if anything bad happens!).
Step 1: Update the Ubuntu operating system
It’s my first step when I receive a new machine. I’ll assume you’ve installed Ubuntu and that you’ve got it online. You’ll need to enable the Broadcom wireless driver from the restricted repository but the OS should do that first thing without any user intervention. You can use the update-manager GUI to update the machine or, from the command line:
sudo apt-get update && sudo apt-get upgrade
Enter your password if necessary and after that’s finished, restart the machine and continue to Step 2.
Step 2: Update the system BIOS to the latest version
For this step, you’ll need to ensure that your XT2 is plugged in to wall electricity. In addition to installing the BIOS updater as well as the new version of the BIOS, we’ll also install one piece of software for later on (see step 5). Once you’re back in to your machine, from the command line:
sudo apt-get install smbios-utils cellwriter

sudo getSystemId
If the SystemID tag returns 0x0252 (which it should for an XT2), then continue on with my instructions. If not, then follow these instructions. If you need to go to the external link, when you’ve updated your system BIOS, come back here and continue with Step 3.
Please note that due to word wrapping, the third line (the wget operation) ran onto two lines. That entire command is one line in the terminal. You might want to right click on this link (the bios.hdr file), select “Copy Link Location” (or whatever your browser says), and paste that address in after you’ve typed wget.
cd ~

sudo modprobe dell_rbu

wget http://linux.dell.com/repo/firmware/bios-hdrs/system_bios_ven_0x1028_dev_0x0252_version_a12/bios.hdr

sudo dellBiosUpdate -u -f bios.hdr
If there are no errors, then restart the machine:
sudo reboot
Your machine will reboot and install the A12 BIOS version. DO NOT UNPLUG OR TOUCH YOUR MACHINE DURING THIS TIME! It’s a completely automated process that will run on its own. If any problems occur, then you’ve got yourself a fancy paperweight. Let’s avoid that, okay?
Step 3: Check system BIOS for wireless cards configuration
This might be a superfluous step; however, I was working on my XT2 and I noticed that the wireless card stopped working and didn’t respond to the wireless switch. I rebooted the machine and checked the BIOS configuration to see what cards were installed in my machine and what cards were controlled by the wireless switch on the side as well as the Fn + F9 key combination. Here are some screen captures that I captured on my phone — sorry for the quality:
I noticed that the wireless switch controlled a WWAN card (for cellular data, which wasn’t installed on my XT2) instead of the WLAN (aka wi-fi) card. I disabled the Bluetooth radio because I determined that I didn’t need Bluetooth on my machine so I disabled that. I also disabled any references to a WWAN card, also ensuring that the switch and the Fn + F9 key combination controlled the WLAN radio only and no other radios.I’ll do some more testing to see what’s happening with this new BIOS configuration.
Step 4: Install the Magick Rotation utility
This is a two-step process because in addition to installing the utility, you need to install a special driver to the kernel.
First, you’ll need to download v1.6.2 of the Magick Rotation utility. It’s what I use on my machine and I’ve gotten the best results from it. To do that, go here and download magick-rotation-1.6.2.tar.bz2. In Nautilus (the file browser…feel free to use whatever you normally use), go to your Downloads folder and right-click on the icon for the magick-rotation-1.6.2.tar.bz2 file you downloaded. Click on Extract Here and a new folder will appear in your Downloads folder with the Magick Rotation folder.

The next series of instructions installs the appropriate drivers to the system so the computer can determine if the notebook monitor is in notebook mode or in tablet mode. In the terminal/console of your choosing, run the following commands:
cd ~/Downloads/magick-rotation-1.6.2/MagickExtras

sudo cp -a dell-wmi-20120302-A09 /usr/src/

sudo dkms add -m dell-wmi -v 20120302-A09

sudo dkms build -m dell-wmi -v 20120302-A09

sudo dkms install -m dell-wmi -v 20120302-A09
Restart your machine, either by sudo reboot or by clicking on the gear icon, selecting Shut Down, and then selecting Restart.
Once the machine has restarted and you’ve logged back in, open the magick-rotation-1.6.2 folder in the file manager of your choice. (It should still be in your Downloads folder, right?)
Double-click on the MAGICK-INSTALL file. You’ll be given this warning,
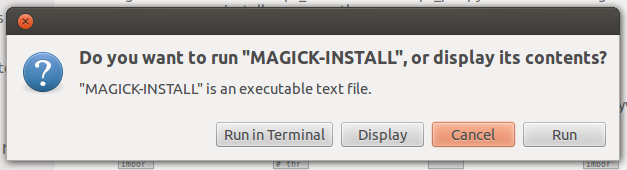
click on Run. A box asking you to enter your password will appear: enter that. Once you’ve authenticated, then a box with something similar to this will appear.

Click “OK”. The installer will run: it took me about a minute. Once the installer has installed the software, reboot again.
Step 5: Have a lot of fun!
This is the fun step because now you can start having fun with the machine and the tablet functions! You’ll need to launch the Magick Rotation utility: it’s the green icon that’s in your toolbar:
![]()
Right-click on that icon and click on Setup. The options are easy to understand and you shouldn’t need to tinker with the advanced options. Be sure to click Save before you click on Close. Also, be sure to left-click on the icon to turn off touch support. This is stylus-writing insurance: it only accepts writing from the stylus and not from other pressure on the display, like your wrist!
Next, flip the lid around. To do that, turn the lid clockwise 180 degrees and the close the lid on top of the keyboard. If all has gone to plan, your screen will rotate to the position you’ve told it to (left, right, or inverted). Take the stylus and start writing. There is a utility that was installed back in step 2 called CellWriter. If you had a Palm Pilot when they were hip, you most likely remember its writing input system, Graffiti. This is a modified system that gives you the option to train the system how you write your letters. For more information in CellWriter, I commend the manual to you by the developers.
If you want to transform your XT2’s screen into a piece of paper, then I recommend the Xournal app. To install that, you can click here or run this command in the terminal:
sudo apt-get install xournal
This application has the nice feature that allows you to annotate PDF files. Xournal also works better if you’ve set the screen to rotate to either the right or left when the lid is in tablet mode.

That’s about it for getting your XT2 to work as a tablet in Ubuntu 12.04, aka Precise Pangolin. I hope you had success and a lot of fun in getting this to work for you! And let me know how this worked for you and what other touch-enhanced applications are out there to use. Also, I’ve only had the machine now for a couple days but I’ll share my thoughts after I’ve come up with a few!